Showing posts with label DecorateIt. Show all posts

Wednesday, June 26, 2013

Pink Bathroom Makeover

Brother:  “Why are you cleaning my bathroom?”

Me: “Because I’m going to snap photos for the blog.  Hope that’s okay.”

Brother:  “Want to photograph my upstairs bath then too?  How about my kitchen?  The dining room?”

Good try, little brother.  Good try.

This is what the bathroom looked like when little brother bought his house.

Pink Tile Bathroom Before

I don’t know about you but I was totally digging that stencil.  That dirty pink tile was to die for.  The oversized vanity and shelving unit where pretty stellar too.

But for some reason, little brother hated it.  I just don’t get it.  He was afraid of the cost to fix it.  Luckily his sister is an important DIY/home decor blogger.  (I kill me.)  Or he’s lucky he has a brother-in-law that is handy.  And a dad that likes to destroy things. 

Some sweat, family bonding and around $350.00 left his bathroom looking like this.

Bathroom Makeover (Beadboard, Peppercorn, Hex tile)

One thing that has surprised me about my brother during this whole house renovation process is that he actually has really good taste.  (Well, minus the deer heads in the living room.)  But overall, his selections have impressed me.  He usually asks if what he likes is okay but I rarely have to tell him it’s not (minus the deer heads).

The makeover started by gutting the bathroom. (We make our father proud.)

Powder Room Makeover

Moving the plumbing and adding a new outlet revealed a giant mass of razors.  About a week later we watched a home improvement show that had the same issue. I guess it was common to just drop razors in a slot in the medicine cabinet and let them fill up a space in the wall.  Guess those dudes weren’t thinking about the poor people in 2013 that would have to clean that mess up.  (Soccer sandals and socks are a favorite trend in Iowa.)

Powder Room Makeover

After cleaning up the hot razor mess, it was time to prime and paint.  I did feel slightly bad covering up someone’s time consuming stenciling.  But only slightly.  Brother could have cared less.  He chose Dutch Boy’s Peppercorn for the wall color.

Powder Room Makeover

It was then time to lay the tile.  The tile was purchased at Menard’s.

Bathroom Makeover

My dad and brother then installed bead board and molding to cover up the tile grossness.

Bathroom Makeover

They then replaced the toilet.  He also added a new sink, light and medicine cabinet. It’s hard to believe it’s the same room.

Bathroom Makeover (Beadboard, Peppercorn, Hex tile)

Pretty impressive finishes for a bachelor.  (I’m still looking for a sister-in-law.  Contact me if interested. I mean, you get a cute house out of the deal.  I’m sure the deer heads are negotiable if you’re not his sister.  Man, I’m going to get sucker punched for this one.  Let’s look at more pretty after photos.)

Bathroom Makeover (Beadboard, Peppercorn, Hex tile)

Bathroom Makeover (Beadboard, Peppercorn, Hex tile)

Who thinks the pink tile was pretty rocking?  Any takers on that whole future sister-in-law thing?

Friday, June 14, 2013

Gallery Wall: Change of Art

Reading blogs pays.  You heard it here first.

Awhile back, I won a giveaway from Kelly’s blog (View Along the Way).  The giveaway was for a set of six frames from Change of Art. 

I was super excited about winning this giveaway. I started a gallery wall in our guest bedroom approximately two years ago.  I wish I was over exaggerating. It was missing frames and photos.  My dad would make smart comments about not recognizing the people in the stock images.  Hardy, har, har.  I couldn’t decide what photos to put in the frames. I needed to buy more.  Excuses, excuses.

I took down the ratty attempt at a gallery wall.  I wish I had a photo. It was good. I patched and painted holes.  I was left with this big, blank wall.

Gallery Wall Change of Art

My Change of Art frames arrived about three months ago. I hung them on Sunday. I don’t like to rush things.  In about 15 minutes, we had our entire gallery wall hung.  Patience pays off.

Change of Art Gallery Wall Guest Room

I was super impressed with the Change of Art frames.  The frames are different because you can easily change out the photos/art you want to display. Which is awesome for someone as indecisive as myself. I’m also accident prone and end up stabbing myself with those stupid black tabby things on the back of most frames.  No blood was shed in this gallery wall.  There is also a spot in the back to store additional photos.  Handy!

Gallery Wall Change of Art

The frames were super easy to hang.  Each frame came individually boxed (all materials are eco-friendly).  In the box was the frame, a hanger, a nail and a paper template to use to assist in arranging/hanging the photo.

I arranged the paper templates on the wall.  I had Nate help me ensure that I had them evenly spaced/level.  I don’t see straight.  Minor problem.  After that, I was on my own.

Gallery Wall Change of Art

Well, I had Ike to help me out.

Gallery Wall Change of Art

All I had to do was place the hanger onto the appropriate spot on the template and hammer away.  (Excuse the look of fear in my eyes.  I hate putting nails in the wall.)

Gallery Wall Change of Art

Once the hangers were installed, I ripped down the templates.

Gallery Wall Change of Art

I then gently placed the frame onto the hanger.  There is a little notch that allows it to rest gently and self-level.

Gallery Wall Change of Art

Gallery wall hung.  And to think it only too me two years.

Change of Art Gallery Wall

Gallery Wall Change of Art

For the first gallery wall set-up, I used some black and white Chicago photos from Decor and the Dog Photo.  *shameless plug*

Guest Room Gallery Wall Change of Art

I’m a big fan of the Change of Art frames. Easy to hang, eco-friendly and made in America.  The only downfall I see is that they are a bit pricey for my cheapskate self. Having said that, I will be purchasing another set in the future because I really like how professional they look and how easy they are to hang.  As the old saying goes, sometimes you get what you pay for!

Are you a gallery wall fan?  What’s your longest running project?

***I wasn’t compensated for this post.  I won the frames in a giveaway and was in no way obligated to post about them. Ike and I just thought the frames were pretty awesome.***

Don’t forget to enter the Method Cute Pet Contest!

Monday, June 10, 2013

How to Build a Flower Tower

I’ll let you in on a little secret.  Remember the vertical garden we built as part of a sponsored program for Home Depot?  Well, we were assigned the project.  We weren’t super excited about it at first with but we ended up really liking it after it was built.  That’s the inside scoop.

Where am I going with this?  Ah, yes.  What I really wanted to build was a flower tower!
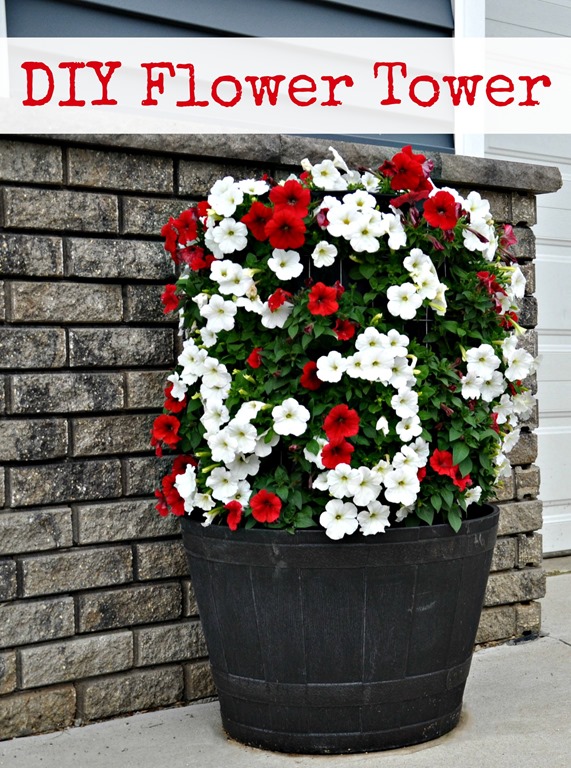
How to Build a Flower Tower {DIY}

I mean, it’s a tower of flowers.  It has a cool name.  I love Home Depot’s commercial where the wife is all like “This won’t take long.  Will it?”  THAT’S TOTALLY ME.

I had to have one. So we headed to pick up our supplies.  I quickly began to realize that these little ol’ flower towers aren’t exactly cheap.  Like those people in the commercial with 15 of them in their backyard must be loaded.  Like Justin Bieber or drug dealer loaded.  Not pharmacist and accountant loaded.

But I had to have one.  You know how that goes. I compromised and limited myself to one tower instead of the 27 I had imagined in my head.

These towers are ridiculously easy to build.  Like I did it mostly by myself.  Whoa.  That’s going to be the theme for this week.  Michelle actually does stuff.  Alert the media.

Gather your supplies. (The reason this project is expensive is that they don’t sell small quantities of some of the materials.  Like you need 3-4 feet of wire fencing and it comes in a 50 foot roll.  Nice.)

    • 4-foot galvanized wire fencing with 2-inch x 4-inch openings (~$30)
    • Landscape fabric (~$10. We had this left over from the vertical garden.)
    • 6-inch black zip ties (~$2)
    • flower pot (Price varies.  We used one we already had.)
    • Dirt (~$13 for a large bag.)

Gather your tools.  (We had all of the tools.)

  • Utility knife
  • Aviation snips or tin snips
  • Scissors
  • The Home Depot recommends gloves when working with the wire. I skipped them but thought I’d throw it in for safety purposes.

Step 1: Create a cylinder with the wire fencing that you will place inside your pot.  Allow an overlap of one fencing section to allow for a more stable seam.  Cut the fencing using aviation snips.

  DIY Flower Tower

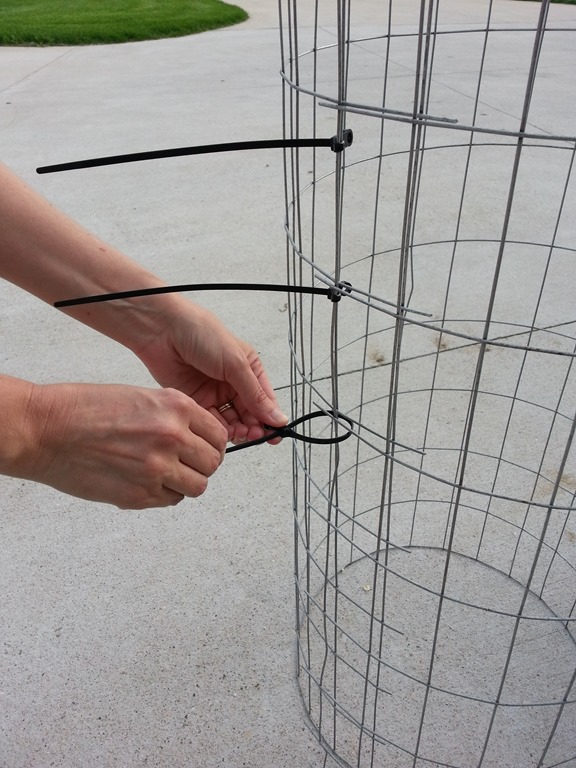
Step 2:  Overlap one section of the wire fencing and use the zip ties to tie the sides of the cylinder together.  I used a tie in each section from top to bottom.  Trim the zip ties to about 1/4”.
DIY Flower Tower

Step 3:  Wrap the landscape fabric around the outside of the tower to measure how much you’ll need.  Overlap an inch or two to ensure that soil doesn’t fall out through the seam.  Cut the fabric to size using scissors or a utility knife.  Slide the fabric inside the wire fencing.  Cut the excess fabric from the top of the tower leaving about 2 inches extending from the top of the tower to help secure the fabric to the tower.

DIY Flower Tower

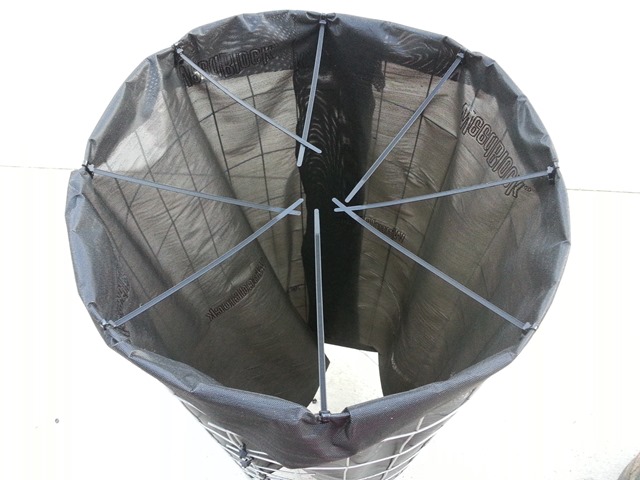
Step 4: Fold the two inch flap over the top of the tower.  Use your utility knife cut small slits through both layers of fabric just under the metal rim.  Cut one slit in every third rectangle of the fencing.  Insert the zip ties through the slits and tie down the top of the fabric.  Cut the ends of the zip ties to about 1/4”.

DIY Flower Tower

DIY Flower Tower

Step 5:  Place fencing in your flower pot.  Fill the tower about 1/3 full with soil.  Add water to settle the soil.  Add another 1/3 of soil.  Add more water.  Fill to about 1 inch from the top of the tower with soil and add water.  Lightly press the soil once it is full to prevent sinking.  I repeated the last water and pressing step a few times.  Also add soil to the inside of the container just outside of the tower.

DIY Flower Tower

Step 7:  Cut a vertical slit in every other rectangle and stagger on your way down the tower.  (The Home Depot instructions suggest making a cross slit.  I found that the flowers were sturdier if I only made the horizontal slit.)

DIY Flower Tower

Step 8:  Add your flowers.  I chose petunias because they grow like weeds in sunny locations.  Use your finger to create a little pocket behind the opening to place the plant into.  It should fit snuggly but you don’t want to shove it in there and ruin the poor little plant’s roots.  Once the plant is inserted into the tower, make sure the flaps of the landscape fabric close around the stem of the flower to help keep the soil in while water.  Don’t forget to plant flowers in the top of the tower as well.

It doesn’t look like much at first.  I’m not going to lie.  It’s pretty hideous for the first two weeks.  I’m pretty sure the neighbors were wondering what the heck the monstrosity by our garage was. 

DIY Flower Tower

DIY Flower Tower

Step 9:  Water and cross your fingers that the thing lives.  As long as you chose petunias and you water them, the tower will live.  I’m certain of it.

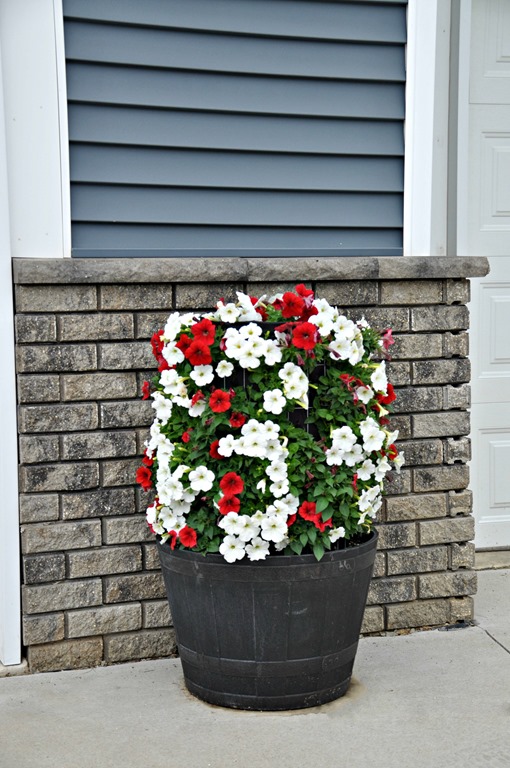
Our tower has been growing for about 3 weeks and it has filled in nicely.  There is still time for you to build one for the summer!
Flower Tower

DiY Flower Tower

How to build a Flower Tower {Decor and the Dog}

How to Build a Flower Tower {DIY}

Any fun outdoor projects planned for the summer? Do your neighbors wonder what the heck you are doing on a regular basis?

Linking up to: Home Stories A to Z

Monday, June 3, 2013

DIY Outdoor Patio Table

How was your weekend?  Nate and I were busy kids.  That’s what the old dude at the hardware store called us anyways. I’m going with it.

We put the finishing touches on our outdoor patio table that Nate built last weekend.  We enlisted the help of Nate’s parents to help us carry it from the garage.  Our patio now has a table and my car can go back in the garage. Double win.

DIY Outdoor Patio Table

This patio has been neglected for the 4 years that we have lived in the house.  We were holding off until we figured out how we wanted to use the space.  We are also cheap.  We aren’t done with the patio yet but we now have a good start.  We’ll probably finish the rest in another four years.  We don’t want to rush things.

DIY Outdoor Patio Table

DIY Outdoor Patio Table

Nate and I both liked this table.  Unfortunately $2000 wasn’t exactly in our outdoor budget range.  Or our indoor budget range for that matter. We were having a hard time shelling out hundreds of dollars (let alone thousands) for furniture that would end up eventually being covered in bird poo and insect guts.

DIY Outdoor Patio Table

Nate thought he could build a similar table.  I said go for it.  $150 and a few hours later, we had ourselves an outdoor table. 

DIY Outdoor Patio Table

DIY Outdoor Patio Table

DIY Outdoor Patio Table

I found the outdoor chairs for $8/chair at a local antique store.  $220 isn’t exactly pocket change but we’re happy with it beings that we have a heavy/sturdy outdoor table with seating for eight.

DIY Outdoor Patio Table

Outdoor Table-4

DIY Outdoor Patio Table

Ike hasn’t been down to check out the table but he appeared to approve from his perch in the living room.

Outdoor Table-6

We’ll be back on Wednesday with a tutorial on how to make the table.  In the mean time, I have to continue to make the neighbors question why I’m setting a table for a fake dinner party outside.  We were actually going to use this setup yesterday until the gnats carried me back into the house.  You think I’m joking.  They are that bad.  Guess they dig the new outdoor table too.

Linking up to: Thrifty Decor Chick

Tuesday, May 28, 2013

Outdoor Folding Chairs

How was your Memorial Day week-end (U.S. readers)?  How was your Monday (non-U.S. readers)?

Our long holiday week-end was a wet one.  It was cold and gloomy.  The only positive was that we could blame our lack of productivity on the weather and not on laziness.  Thanks, Mother Nature.

We did get some stuff done.  Nate finished building our outdoor patio table (more on that next week).  Ike napped and barked at the poodle across the street.  I did some housewife stuff and a little painting.  I also did some successful thrifting.

A new antique store opened in town, The Antique Cartel.  The store has great displays, isn’t crammed with stuff and the items are priced well.  I shouldn’t be telling you all about this.  Don’t steal my bargains. My first visit didn’t disappoint.  I instantly fell in love with these chairs.

Thrifted Outdoor Folding Chair

I have had my eye on some West Elm outdoor folding chairs.  The West Elm chairs are $98 per chair.  Yeah.  $100 to sit outside.  Did I mention that I also need eight of them?  Yeah.  Dream big, Michelle.

The antique chairs above were $8 per chair. Are they in perfect condition?  No. Are they sturdy? Yes. Do they have some awesome charm and character?  Yes.  And they were $90 cheaper than the ones I had been drooling over.  Think I’ll take that $720 and do something fun.  Like pay off the mortgage. (Being married to an accountant is hard.)

Speaking of the mutant, I sent Nate a text to stop and check them out.  He approved without hesitation.  Amazing.  That never happens.

We loaded eight of them up and hauled them home.  (I only drug four out of the garage for blog photo purposes.  I’ll blame it on the potential for a downpour and not laziness.)

Thrifted Outdoor Folding Chair

Thrifted Outdoor Folding Chair

I am currently working on cleaning them up. I’m also going to give them a quick coat of poly to help them hold up against the elements.  We don’t use our back patio a ton so I think we’ll store them inside beings they fold up easily.

Man, I love a good bargain.

How was your week-end?  Any great finds lately?

Wednesday, May 22, 2013

Shopping at The Tile Shop

On Saturday, Nate and I headed to Des Moines to pick out some tile at The Tile Shop.

The Tile Shop Des Moines

This is our second shopping experience at The Tile Shop.  Our first round of shopping was to pick out tile for our kitchen backsplash.  For the backsplash, we chose the Imperial Bone Gloss 3x6 subway tile. We had a tough time finding tile that would match our not quite white but not quite ivory cabinets.  The Tile Shop came to our rescue.

Subway Tile Backsplash Black Granite Imperial Bone Gloss

This trip was to pick out tile for our master bathroom.  We were super happy with the customer service/quality of tile/selection from our first round of tile shopping that we decided to make the 2 1/2 drive for our next project!

We had a good idea of the type of tile we wanted when we headed into the store but it never hurts to look.  I started by drooling over the display bathrooms in the store.

The Tile Shop Display Bathroom

The Tile Shop Display Bathroom
I loved both of these displays but Nate tried to get me to focus on our bathroom.  Always the voice of reason that husband of mine.
 
I then became obsessed with hex tile.  It’s just so quirky and pretty.  Nate had his work cut out for him.

The Tile Shop Hex Tile

We decided that blogland was clouding my judgment.  That hex tile is b-e-a-utiful but doesn’t fit well with our home’s style.  It’s really easy to get sucked into the trends of blogland and not remember what you actually like versus what is popular amongst home decor bloggers.

We ultimately decided on a super brave and daring option.  The Imperial Blanco Gloss 2x12 subway tile.

Imperial Blanco Gloss 2x12 Subway Tile

Subway tile is such a classic choice. We liked the 2x12 size.  The size was part of our daring side coming out. It’s totally not that traditional 3x6 stuff. Subway tile fits well with the modern/country/industrial hot mess vibe that we have going on in our home.  We chose the dark grout (charcoal) shown at the bottom.  We do have plans to do a little twist with this tile.  I just don’t want to fully commit on decision on the blog because we aren’t sure if it will work.  I told you we were brave and adventurous. 

The manager of the store was super helpful.  He was able to answer questions about what tools and supplies we would need to complete the project.  He pointed out tiles that may work well in our space. The only problem I had with The Tile Shop was that there were too many awesome types of tile to choose from.  I’m glad we went into the store with a good idea of what we wanted because I might still be there.  I wonder if those showers are functioning…

We can’t wait to get started. I need to get to picking out some new mirrors (And possibly lights, if I can convince Nate that they are a need and not a want.) during the long week-end. Sounds like a good way to spend the holiday week-end!

Are you a fan of The Tile Shop?  Are you a subway tile fan or do you prefer that hipster hex stuff?

This is not a sponsored post. The Tile Shop is providing me with free tiles and supplies. They aren’t requiring me to post about their awesomeness.  I’m just a really big fan!
Related Posts Plugin for WordPress, Blogger...

My blog has moved

You will be automatically redirected to the new address.

If that does not occur, please visit http://www.decorandthedog.net'.